How to Shoot Cinematic Video in Low Light with a Budget Camera
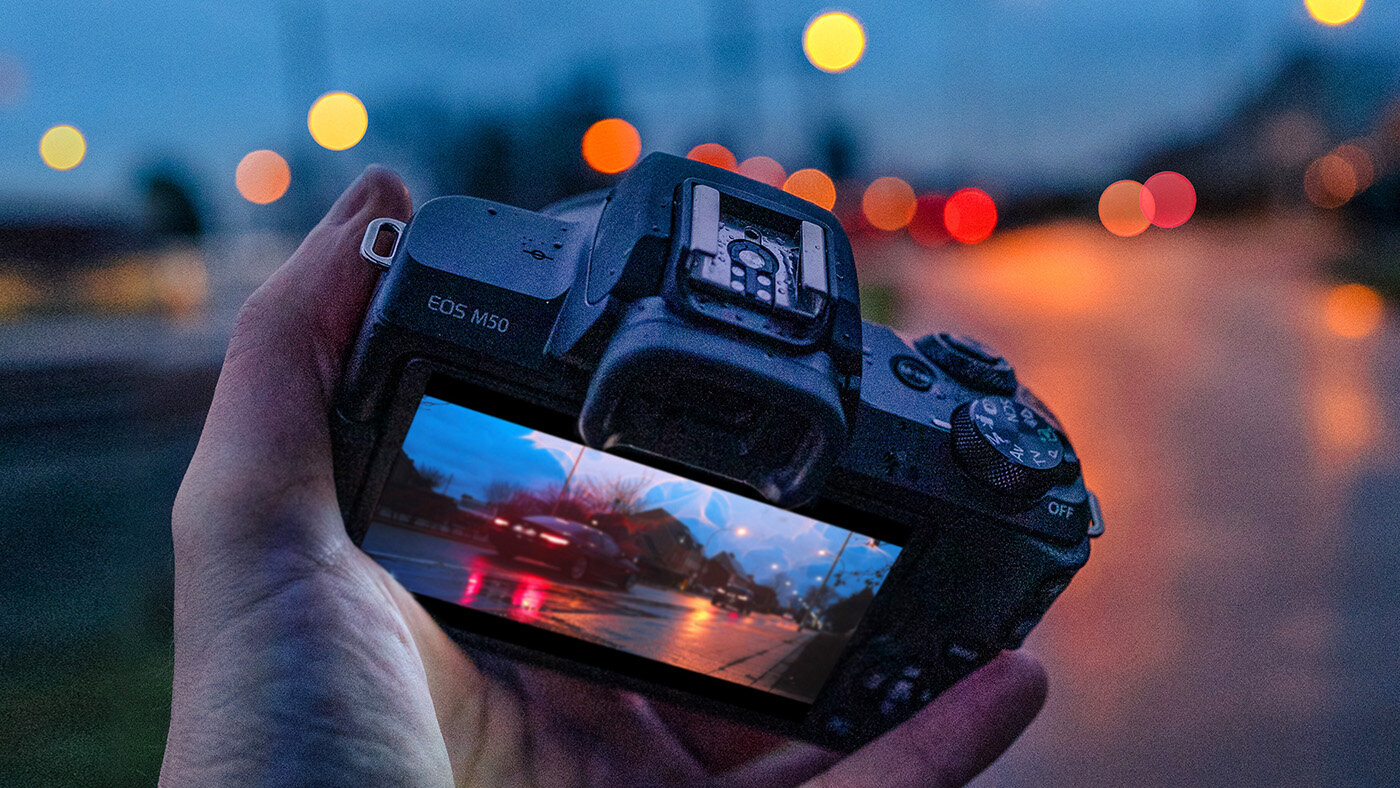
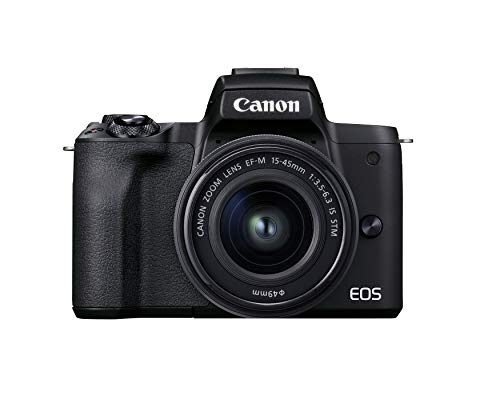
Some cameras do really well in low light. Getting crisp video at ISO 12800 is possible with my Sony A7S III but not so much with my Canon M50 or any other camera in that price range. And that’s exactly why I used it to shoot a short cinematic video sequence after sunset. I took my camera and we went on a 30-minute walk…
Don’t want to read? Watch the video here on my YouTube channel…
Low Light Cinematic Video with a Budget Camera
So, I’m not gonna lie. Low light cinematic video with my Canon M50 or pretty much any other budget camera, doesn’t look as crisp as what you get out of a more expensive camera. But that doesn’t mean it looks bad or ugly. First thing you need to understand is that noise is not necessarily a bad thing.
ISO & Noise
The biggest problem you’ll face when shooting with a cheaper camera is noise. Less light means that you’ll have to crank up the ISO to get a well exposed image. Now, the Canon M50 specifically can go up to 400 no problem and once you get to 800 and 1600, you get a noisier and softer looking image.
But again, that’s not a bad thing. As long as the noise doesn’t damage areas in the image, it adds to the atmosphere. So, even if your camera gives you noisy footage, you can still make it work for a cinematic video. Just go for a dark and gritty style and the noise in the footage will enhance that feeling.
Canon M50 Low Light Cinematic
Of course, there is such a thing as too much noise or bad noise. Colored noise is what usually damages shadow areas in the image and to avoid that, you have to keep the ISO under control. The Canon M50’s limit tis around 1600. Beyond that, you’ll have to be careful. And a good way to keep ISO under control is by using a fast lens.
Best Lens for Low Light Cinematic Video
Shooting at high ISO levels will make your footage look softer so you can get away with using lenses that are not razor sharp. What you do need is a fast lens. That means a lens with a wide aperture like f/2.0, f/1.8 or even f/1.2.
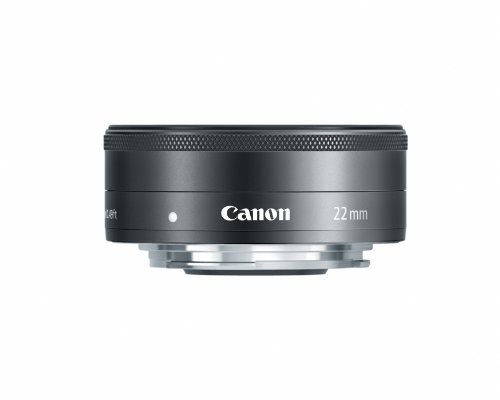
Shooting at a wide aperture will allow you to keep ISO under control. I shot everything in my sequence with the Canon EF-M 22mm f/2.0 but of course there are many options for whatever brand of camera you have. Make sure to look at prime lenses instead of zoom lenses as they’re usually faster.
And of course, find out what the ISO limit for your camera is. It’s different for every camera.
Best Color Profile
And finally a short word about color profile. If your camera supports any kind of LOG profile and you know how to expose and grade it, it’s probably the best option in a lot of cases. For low light, it’s not always the case. And if your camera doesn’t support LOG, I would suggest to shoot in a Neutral or Standard camera profile.
It gives me the best results in low light and to allow some room for color grading, I usually turn down saturation, contrast and sharpness in-camera. Why also sharpness? Because in-camera sharpness will make noise look even worse.
Don’t forget to check out my video. There’s more tips and advice.
Thanks for stopping by!